HotWire 5.7.3
VEGAS 2.0
RS/RSPRO 2.12 Software User Information Guide
Thank you for choosing Tekin for your R/C racing needs. In this document we will go over all the settings and features the HotWire PC Interface offers you, the competitive racer for your RS/RSPro Electronic Speed Control (ESC.)

I. Connecting your HotWire and RS/RSPro
Firstly, you will need to plug your provided USB cable into a USB 2.0 port on your Desktop/Laptop/Netbook. These may be located on the back of your PC tower on your desktop, or on the sides/back of your laptop or netbook. Once the USB cable is plugged in, plug the other end into your HotWire device.*
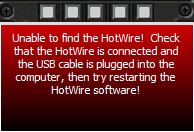
*Make sure the GREEN light is ON. You may need to plug the USB cable into the HotWire with a little force and it will *snap* into place. This is to assure you have a solid connection to your computer. If you do not have the HotWire connected properly, you will see this message:
Now that your HotWire is plugged in correctly, you should see this portal: 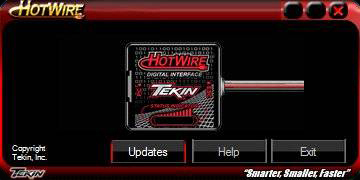
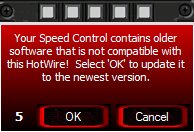
You may now plug in your RS/RSPro.* The above portal will close and if your ESC has older software than what is currently installed on your computer, you will see this message:
*Please note that the center LED on your ESC will begin flashing and the GREEN LED on the HotWire device will begin flashing as well.*
Click "Yes" and the HotWire will begin the update process. This will consist of 4 steps and will take roughly a minute to complete. DO NOT DISCONNECT THE ESC OR THE HOTWIRE during this process. Doing so can permanently damage your ESC. Please note that anytime you update versions on your ESC, all settings are reverted to factory default and a radio calibrate will need to be done.
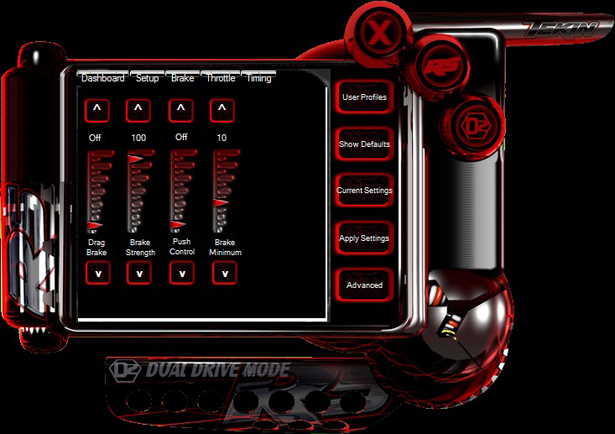
II. The Dashboard
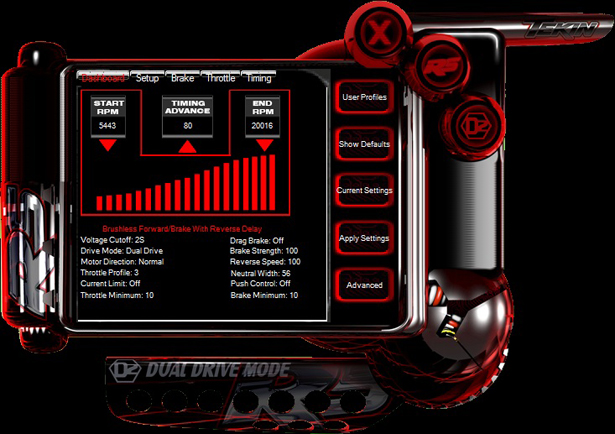
Once the ESC has updated, you will be brought to the Dashboard. This shows you all the settings currently in your ESC (which will be factory default if you have just updated to the 2.12 software.) The dashboard will look like this if you installed the Full Version:
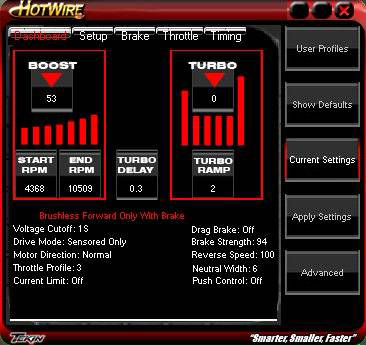
The Express Version Dashboard will look like this:
You cannot adjust settings on the Dashboard, its purpose is to show you everything in your ESC and where the settings currently are. To learn how to adjust settings and what they mean, please continue.
III. Advanced - Updating your ESC software version

You will notice 5 buttons towards the right of your HotWire GUI. The first button we will go over is the Advanced button. Clicking this button will slide the GUI open to the right and reveal the available and current versions of ESC software.

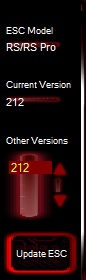 Here you will be able to update your ESC and view which version you have. If you wish to update or reflash your software, simply highlight the version you wish to use and click Update ESC. Here you will be able to update your ESC and view which version you have. If you wish to update or reflash your software, simply highlight the version you wish to use and click Update ESC.
The other buttons consist of:
 : This button will take you directly to our Team Driver ESC setups page on www.teamtekin.com. Users can view and save Team Driver profiles for their own use in .pdf format. Soon users will be able to download specific profile files that can be loaded directly into their ESC through the HotWire, along with creating, saving and sharing their own profiles saved on their hard drive. : This button will take you directly to our Team Driver ESC setups page on www.teamtekin.com. Users can view and save Team Driver profiles for their own use in .pdf format. Soon users will be able to download specific profile files that can be loaded directly into their ESC through the HotWire, along with creating, saving and sharing their own profiles saved on their hard drive.
 : This button simply shows the factory defaults for every setting available on your ESC. To quickly revert your ESC back to factory settings, click Show Defaults and then Apply Settings. : This button simply shows the factory defaults for every setting available on your ESC. To quickly revert your ESC back to factory settings, click Show Defaults and then Apply Settings.
 : This button shows the current settings in your ESC. Changing any setting and then clicking Current Settings will void any changes you made as long as you haven't hit apply. : This button shows the current settings in your ESC. Changing any setting and then clicking Current Settings will void any changes you made as long as you haven't hit apply.
 : This button will save any settings you have changed to your ESC. Anytime an adjustment is made, you must click Apply Settings for those changes to take effect. : This button will save any settings you have changed to your ESC. Anytime an adjustment is made, you must click Apply Settings for those changes to take effect.
IV. Setup
* Please note that at any time you may right click on select sliders to reveal more options. Hover your mouse right over the adjustment bar and a message box may appear letting you know you may right click for more options.*
The setup tab is the next part of the HotWire we will look at. In this tab, There are 3 adjustable sliders and 4 check boxes:

This is where you choose to run in either Sensored or D2 mode, choose Timing Profiles, set your Voltage Cutoff and choose your Motor Type.
 Voltage Cutoff: This slider is for setting the low voltage cutoff for LiPO cells. You have a choice of: Voltage Cutoff: This slider is for setting the low voltage cutoff for LiPO cells. You have a choice of:
OFF: No Cutoff, for use with NiMH, Ni-CD and any other cell that does not require a voltage cutoff for safety.
2S: Setting for 2S LiPO that cuts at 3.0V/cell or 6.0V pack voltage.
3S: Setting for 3S LiPO that cuts at 3.0V/cell or 9.0V pack voltage.
CUSTOM: With the slider in the up position, you will see an editable field with numbers. This will allow you to set a custom cutoff for your cells. The example below shows the cutoff at 3.14V. For 2S, a cutoff of at least 6.0V is recommended. Typically it is better to set the cutoff for 6.2V or right around there. For 3S, a cutoff of at least 9.0V is recommended and it is common to see cutoffs around 9.3V
*Factory Setting is 2S*
*Please refer to your battery manufacturer's specifications for recommended low voltage cutoffs and battery safety. Not all cells are made equal.*
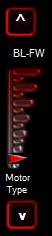 Motor Type: This slider is for choosing the type of motor you are using and whether or not you have reverse. Your choices are: Motor Type: This slider is for choosing the type of motor you are using and whether or not you have reverse. Your choices are:
BL-FW: Brushless motor, forward only with brakes.
BL-F/R: Brushless motor, forward to immediate reverse (recommended for rock crawlers ONLY.)
BL-DL: Brushless motor, forward with reverse delay. Both forward and reverse are enabled, with a delay going from forward to reverse. This is the safest for your transmission if you wish to have reverse.
BR-FW: Brushed Motor, forward only with brakes.
BR-F/R: Brushed Motor, forward to immediate reverse (recommended for rock crawlers ONLY.)
BR-DL: Brushed Motor, forward with reverse delay. Both forward and reverse are enable, with a delay going from forward to reverse. This is the safest for your transmission if you wish to have reverse.
*Factory Setting is BL-DL*
 Timing Profile: This slider contains 5 preset Timing Profiles for your ESC. Setting any of the 5 preset profiles will automatically put your ESC into Sensored Only mode. Profiles 1-5 are as such: Timing Profile: This slider contains 5 preset Timing Profiles for your ESC. Setting any of the 5 preset profiles will automatically put your ESC into Sensored Only mode. Profiles 1-5 are as such:
TP1: Spec Stock "blink mode" 0*timing boost
TP2: 15* Timing Boost / RPM Range 5443-20,016
TP3: 25* Timing Boost / RPM Range 5443-20,016
TP4: 35* Timing Boost / RPM Range 5443-20,016
TP5: 45* Timing Boost / RPM Range 5443-20,016
*RPM Ranges are divided in half when running in 1S LiPO Mode*
You may notice that when any preset Timing Profile is in use, the Timing tab is inaccessible. This is because these presets are just that and are not allowed to be changed. To create your own unique setup, we have provided C1 and C2:
C1: Custom user profile, Timing Boost, Turbo, Turbo Delay, Turbo Ramp and RPM Ranges can all be custom set and saved to this profile.
C2: Same as C1.
*Factory Setting is C2*
Now, C1 and C2 are great for racers running multiple classes with the same chassis or ESC. With these custom profiles you are allowed to save them BOTH in the ESC for later use, as well as the 5 preset profiles. So say you have 17.5 spec, running TP1 "blinky" mode one heat and the next you run 13.5 Pro Stock with the C1 profile. This essentially allows your RS/RSPro to be 2 ESCs in one by simply switching between profiles while swapping motors!
Check Boxes:
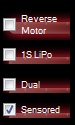
Reverse Motor: Changes the motor rotation direction while maintaining sensor operation. *You cannot swap two wires on a sensored system like you can with a sport sensorless system*
1S LiPO: Allows the use of a 1S LiPO battery in conjunction with a LiFE receiver pack or 6.0V booster. Receiver packs and voltage boosters are required for proper operation, receivers and servos are looking for at least 6.0V out of the RS/RSPro's BEC*. When starting with a 4.2V (fully charged) LiPO pack, the RS/RSPro cannot provide the needed 6.0V to the receiver and servo.
*BEC- Battery Elimination Circuit. This circuit is intended to provide necessary operating voltage to your receiver and servo(s.) Normally about 6V output from the ESC.*
| 


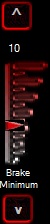 Brake Minimum: This is a new feature for 2.12 and adjusts the minimum amount of brake that can be applied. Factory setting is "10" and "10" is equal to how the braking used to be in 2.08. You can now adjust it further if you wish for less brake to be applied at first touch of brake on the trigger. This will give the brakes a softer entry and will help keeping the car settled during braking.
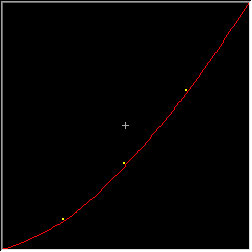
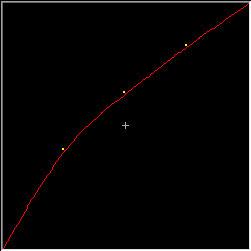
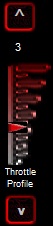 Throttle Profile: There are 5 preset Throttle Profiles and 2 Custom Profiles. The 5 presets are as such:
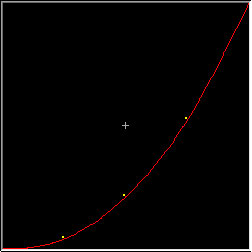


 Neutral Width: Adjusts throttle deadband around Neutral. Lower values provide a more sensitive trigger response and higher values provide a less sensitive trigger response. Lowering the value too far can cause problems with some receivers and your ESC may not arm at powerup. This is because the ESC is looking for a very specific neutral signal and if the radio is not dead on with the signal (as almost none of them are at this high a resolution) it will not accept what it sees as neutral and will not arm.
 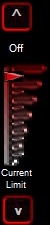 Current Limit: Adjusts throttle response during acceleration. Low values allow less amounts of current to pass to the motor, high values allow higher amounts. Putting the slider in the full UP position disables the Current Limiter and allows full potential power of the system.
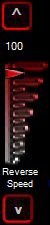 Reverse Speed: Adjusts maximum Reverse Speed. The higher the number, the faster reverse will be, the lower the number, the slower reverse will be.
  Throttle Minimum: This is a new feature for 2.12 and adjusts the minimum throttle that will be applied to the motor. Factory default is "10" and "10" is where 2.08 was permanently set. Lowering the number below ten decreases the initial speed the motor will drive at with the least amount of throttle being applied. This is beneficial for rock crawlers to be able to drive at very slow crawl speeds. Raising the number will cause the startup to be abrupt and have a faster minimum speed than factory.
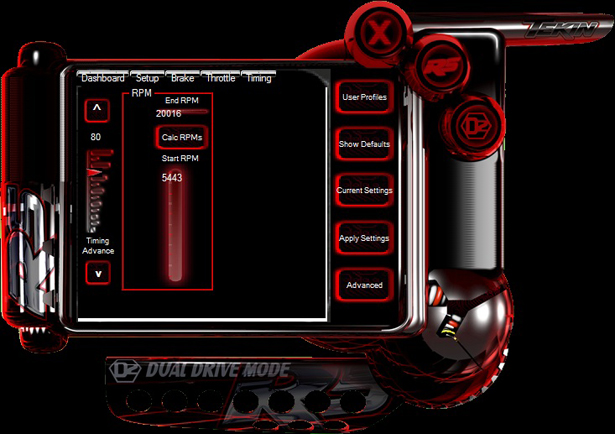
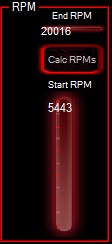
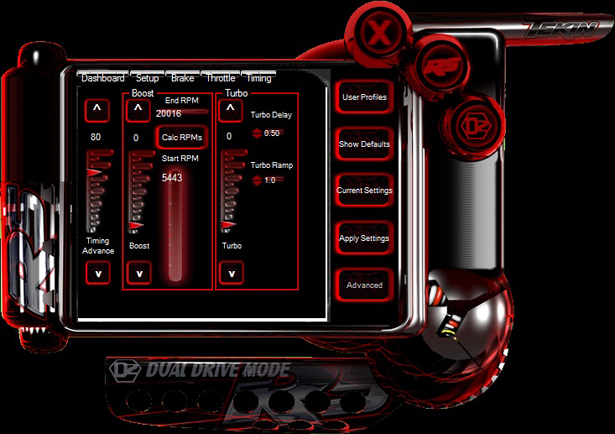
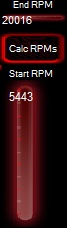 RPM: Same as described in sensorless timing. Adjusts the range at which the user's set timing will be applied. Typically 5,000 start RPM with a 20,000 end RPM is a good starting point for most motors and setups on 2S LiPO. For 1S LiPO, divide both values by 2.
 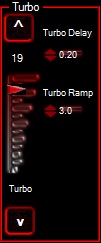 Turbo: Again, it is what it says. Turbo adds even more Timing into your setup on top of any Boost you already have set for a burst of power on the straightaways. Also measured in degrees.